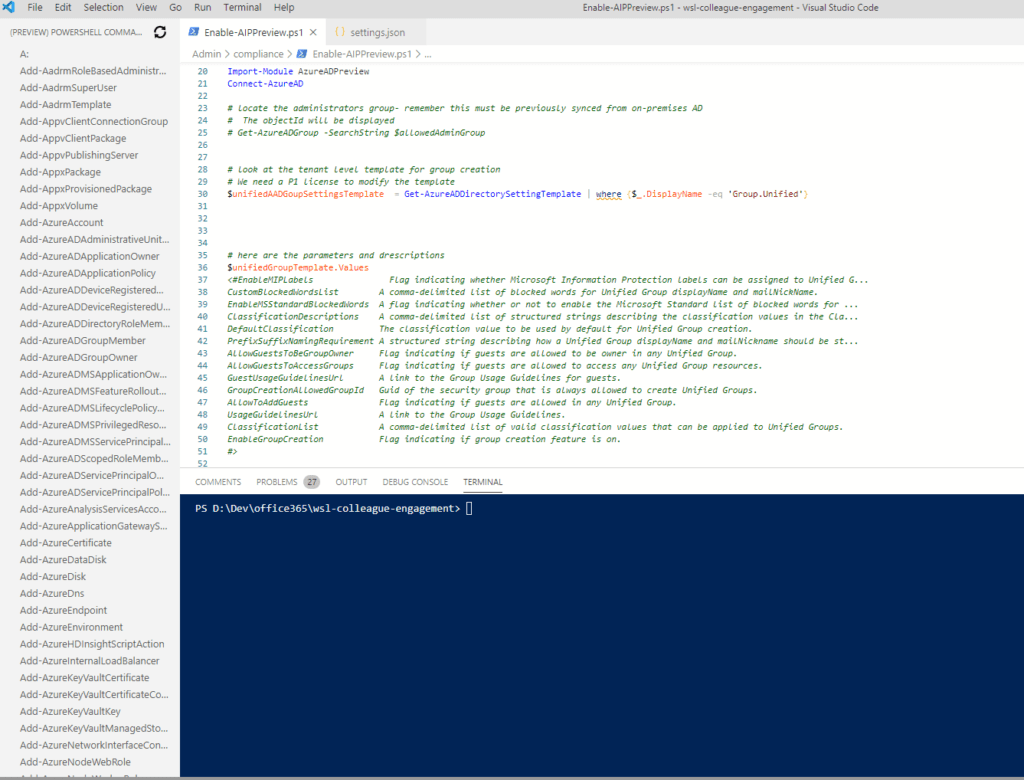
You might well be thinking of replacing the Windows PowerShell Integrated Scripting Environment (ISE) , now that Microsoft has announced they have stopped actively developing it. Indeed, on Episode 160 of the Microsoft 365 Developer Podcast : Dev tools that make IT Pros smarter; Matthew McDermott, MVP (@MatthewMcD) spoke about the productivity gains offered PowerShell language support in Visual Studio Code through the VS Code PowerShell extension .
This inspired me to reach out to Matt and subsequently the PowerShell extension team on GitHub, in order configure the PowerShell support. This post documents the steps needed
PowerShell Core 7 Support
Update 25/03/2020: Learn how to configure the VSCode PowerShell Extension for PowerShell 7 in my handy guide. READ MORE…
PowerShell Language Support
The PowerShell language support includes
- Syntax highlighting
- Code snippets
- Intellisense for cmdlets ( both in the code editor and the integrated terminal
- Find references to cmdlets and variables.
- Rule based analysis provided by the PowerShell Script Analyser
- F8: to run a selection of highlighted PowerShell script
- Ctrl + F1: to launch online help for the symbol under the cursor
One word of caution on the syntax highlighting support: when comparing the PowerShell ISE, you cannot have the same pop-up dialog when you hit Ctrl + Space in the terminal window, to show object properties or Cmdlet arguments. This is because of a limitation in VS Code. You can however, fallback on the PSReadline‘s “Menu” completion. The next section covers what this means in practice.
PSReadline
PSReadline in the context of VSCode refers to the following new features:
- “Menu” completion is similar to the intellense: select completion with arrow keys but instead uses Ctrl + Space . Note, this is
which is identical to what you get in regular pwsh.exe. - Ctrl + Arrow keys ,etc (keyboard navigation of the input line)
- Syntax highlighting of input text
- Multi-line text input (writing a function definition in the console across multiple lines)
- Up / Down Arrow history navigation
Eventually, the team will roll out the full PSReadline experience as discussed in Scott Hanselman’s post, identical to a regular console.
Configure PowerShell Preview Exension
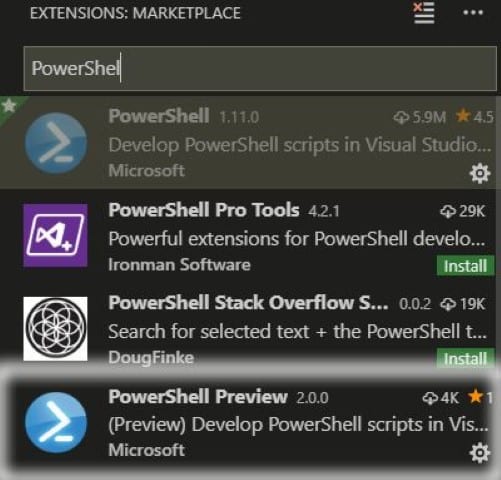
To get PSReadline support you will need add the latest PowerShell Preview extension to VSCode . It works with PowerShell 5.1 and up. Note, If you already have the stable PowerShell extension (1.x.x) , then you will first need to disable this so that you don’t run both versions of the same extension.


You will also to edit your user settings:


Edit User Settings.json
Notepad %APPDATA%\Code\User\settings.json
Then add the following line to enable PSReadline via a feature flag.
Edit Your Personal VSCode Profile Settings
Whilst in the VS Code terminal you will need to edit your VS Code specific profile :
$profile
C:\Users\[User}\Documents\WindowsPowerShell\Microsoft.VSCode_profile.ps1
Notepad $profile
Or if you prefer, to create the file if it doesn’t exist, then open it in VS Code.
New-EditorFile $profile
Note the above profile is only active when working with PowerShell in VS Code . Should you go back to work in the ISE then you will require the PowerShell ISE specific profile .
Then add the short key mappings:
Next, you will need to restart VS Code or execute the command below, to reload the workbench window, for above changes to take affect.
Open the command palette ( Ctrl + Shift + P )
Reload Window
To test, you can set a breakpoint in the debugger and inspect the properties of an object with Ctrl + Space . You should see the PSReadLine experience which is identical to what you get in regular pwsh.exe
Configure PowerShell 7 Support
On March 7th 2020 the team announced a major release of the extension (2020.3.0) which supports PowerShell 7 and ISE Compatibility mode.
PowerShell Core, is both open source and cross-platform ( Windows, MacOS and Linux). Furthermore, PowerShell 7 is based on .NET Core 3.1, whereas Windows PowerShell 5.x is based on the .NET Framework. Given, that PowerShell core is fairly new there will be missing cmdlets and modules. Therefore, you will want have both versions installed and to easily switch between them. Here are the installation steps that will help you do this:
- Install PowerShell 7
Follow the steps in: One-liner to install or update PowerShell 7 on Windows 10
- Install the Shell Launcher VS Code extension
Install and configure the Shell Launcher ,as described in Configure Visual Studio Code to run PowerShell for Windows and PowerShell Core Simultaneously Note, it might take a number of attempts to find the free Keyboard binding for the launcher. I ended up with this :
{ “key”: ctrl + shift + #
“command”: “shellLauncher.launch”} - Edit Settings.json to Configure the Desired Shell Launcher Shells
Open settings.json and add both PowerShell Core 7 and Windows PowerShell 5.1 shell configs ( settings.json example below this instruction block.). Now, switching between both versions of PowerShell using the Shell Launcher will be reflected in both the editor pane and terminal windows. Note, be aware the PowerShell Core 7 installation may remove any previous PowerShell Core 6 installations .
- (Optionally) Install the Settings Sync VS Code Extension
Install the Settings Sync to enable backup and restore (download) of VS Code configuration files via your GitHub account: Settings File, Keybinding file, Launch file, Snippets folder, VSCode Extensions & configurations & Workspaces folder.
You can backup or download a the set of configuration files with these keyboard shortcuts:
Upload Key : Shift + Alt + U
Download Key : Shift + Alt + D
Test Out Your Chosen Keyboard Binding


Remember the PowerShell Preview is still being worked so should you find and issue you may want to recreate and attach the logs before submitting the issue.


